You need to clean under a key, or you're starting a key replacement, or you've noticed something is stuck under there. Either way: pop the key off without wrecking the clip underneath. Here's the technique.
What you'll need
- A clean fingernail. That's the best tool. No screwdrivers, no knives.
- If your nails are short: a plastic guitar pick or a stiff plastic card cut to a 5mm-wide tab.
- Good lighting and a steady hand.
Avoid metal tools. A flathead screwdriver will pry the keycap off, but it will also score the chassis and almost always shears off one of the clip's plastic latches in the process.
The technique
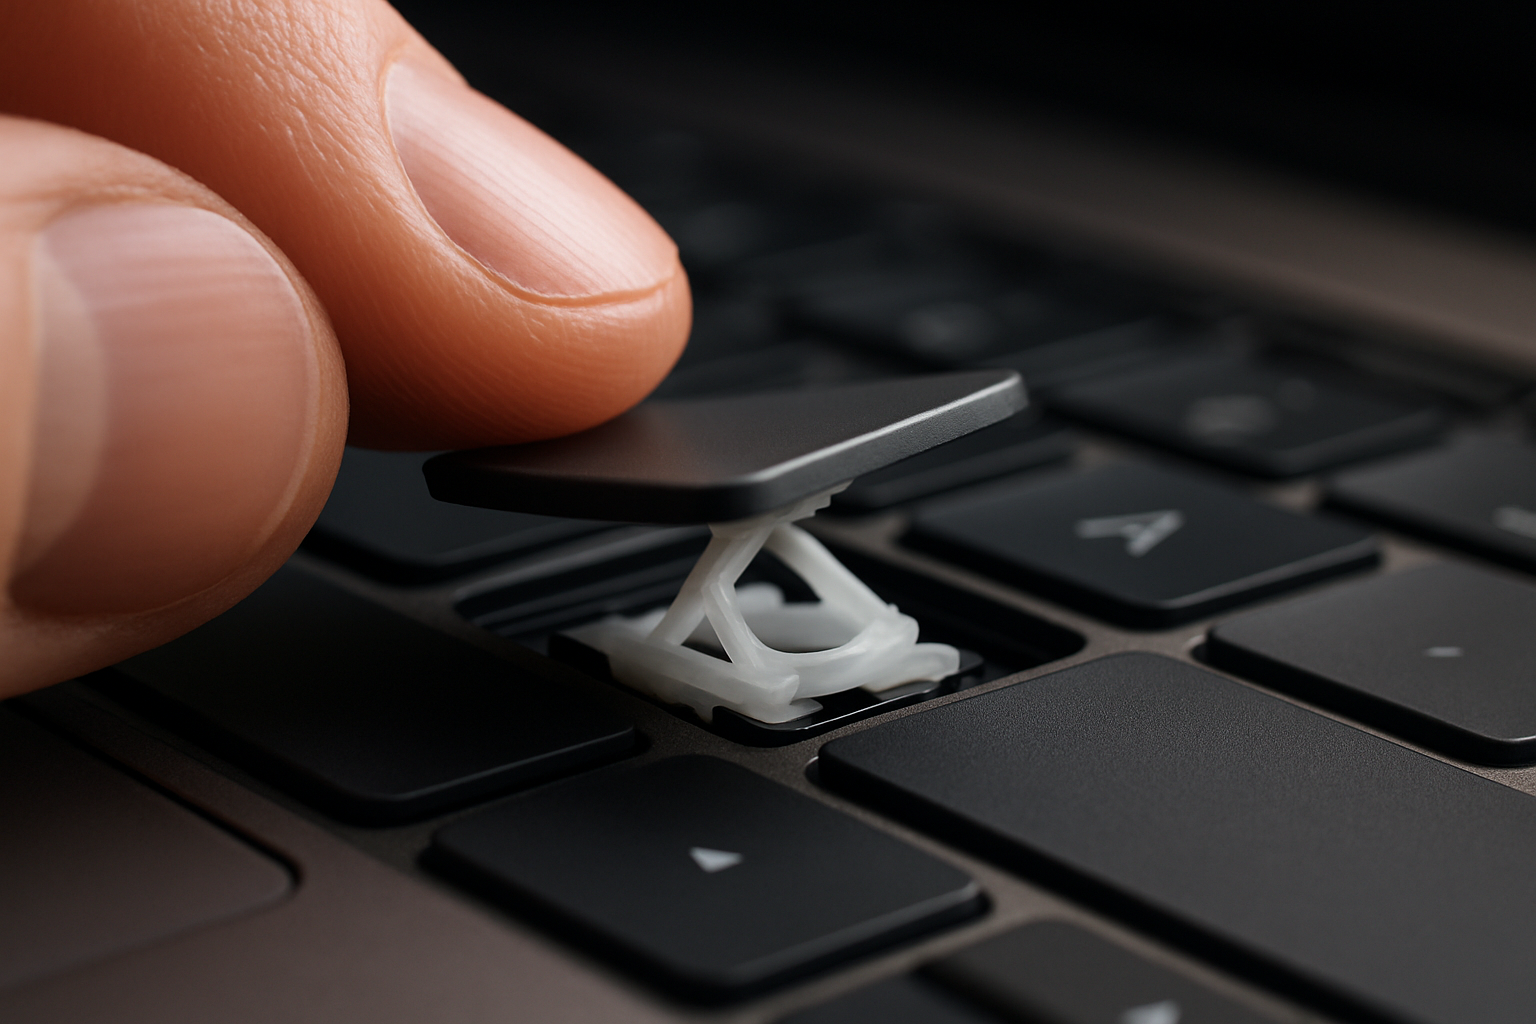
- Pick a corner — bottom or top, not the side. Most laptop keys have their primary latches on the left and right edges, and breakable hooks on the top and bottom. Lifting from the top or bottom releases the hooks first and lets the side latches slide out cleanly.
- Slide a fingernail flat under the chosen corner. Don't dig in — keep the nail parallel to the keyboard.
- Lift gently, straight up, about 2mm. You should feel one set of hooks release with a soft click. If you don't feel anything by 2mm, stop and try the opposite corner — some clips are oriented backwards from what you'd expect.
- Once one corner is free, switch your finger to the opposite corner and lift again. The whole keycap should pop off in your hand.
The whole motion should take three to five seconds. If you're forcing anything, stop — you have the wrong corner.
Modern thin keyboards are trickier
Ultrabooks (XPS 13, MacBook Air, ThinkPad X1, etc.) use shallower clips with tighter tolerances. The technique is the same, but the margin for error is smaller. Two adjustments help:
- Use less force. If you used moderate pressure on a regular laptop, use half of that on an ultrabook. The clips break under loads that wouldn't bother a chunky business laptop.
- Try a guitar pick instead of a fingernail. The thin flat profile of a pick slides in under the cap more gently than a curved nail.
If the key won't lift
Two possibilities. Either you're prying the wrong corner (try the opposite side) or the key is glued down — typically from a sticky spill that dried under the cap. Don't keep prying.
For a glued key: dab a tiny amount of isopropyl alcohol around the edges of the keycap with a cotton swab, wait two minutes for it to seep in and dissolve the residue, then try again. Repeat if needed. Most dried sugar dissolves with a single application.
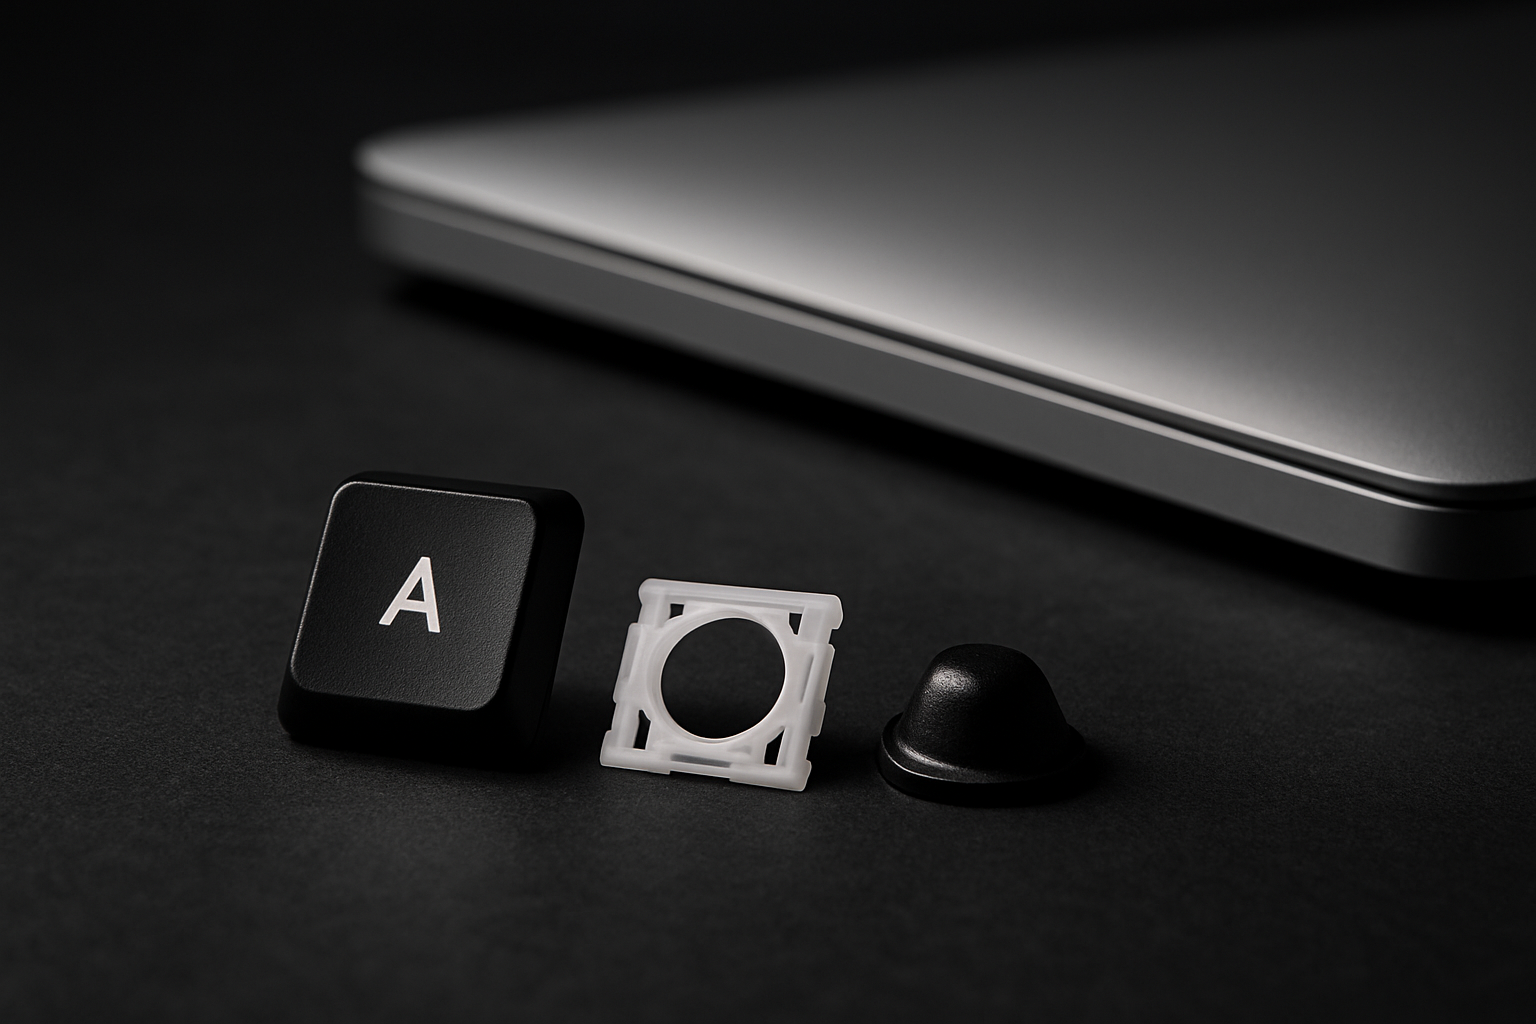
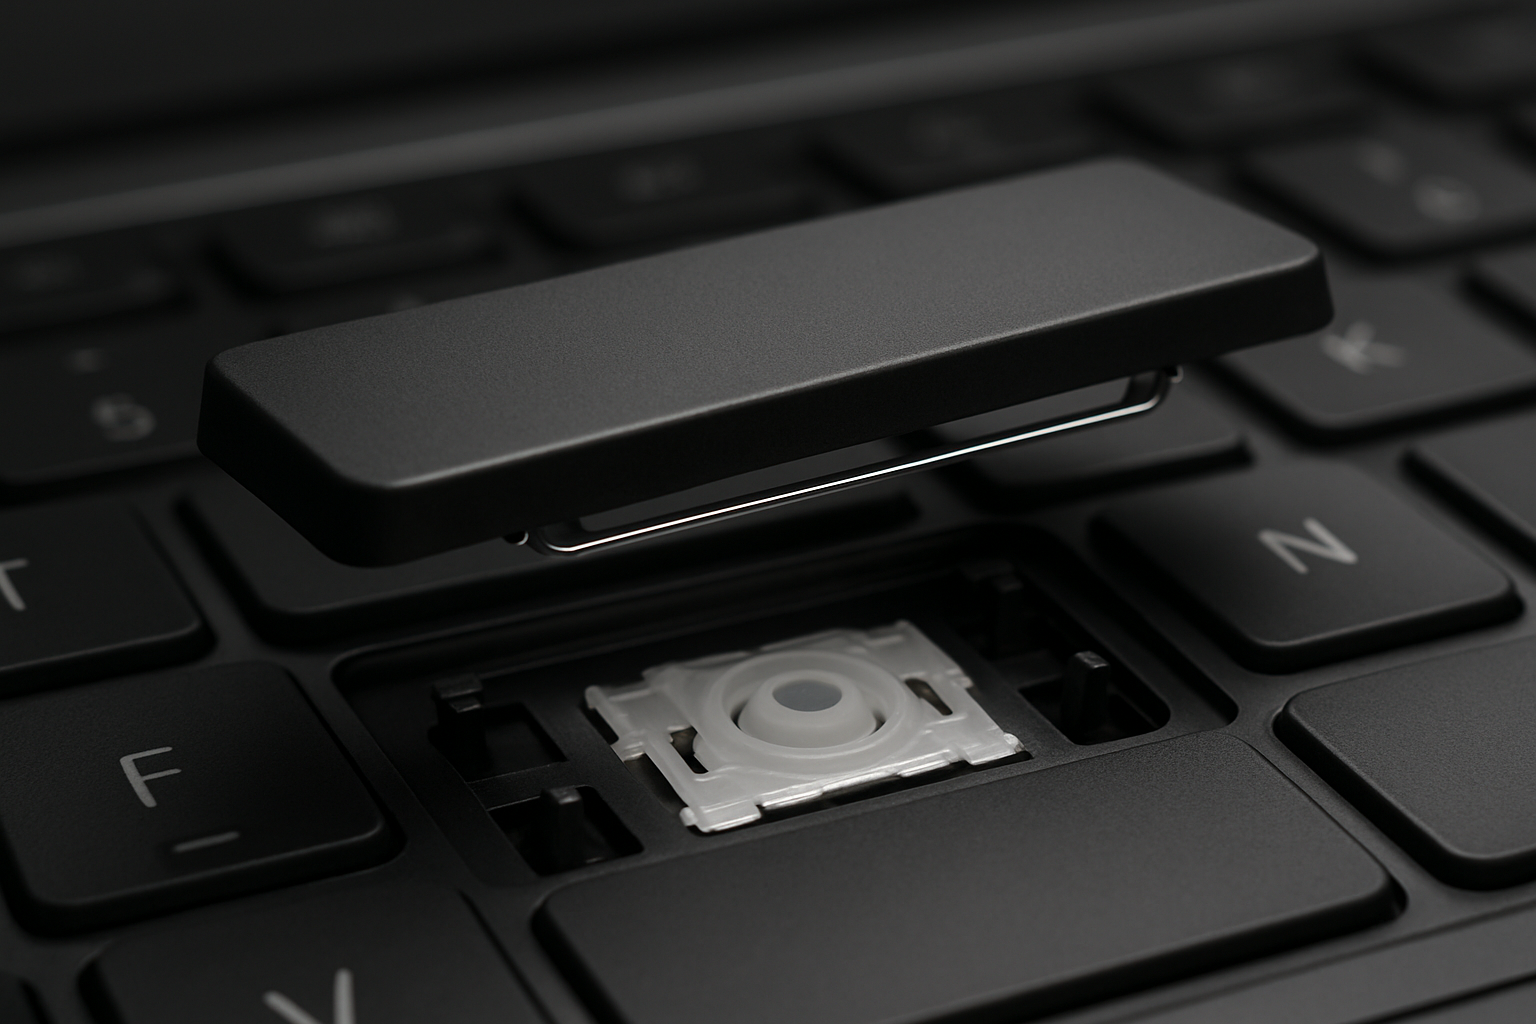
What the clip should look like once the key is off
You'll see a small white or translucent plastic frame — the retainer clip — sitting flat on the chassis. It should be intact, with no cracks or missing corners. Underneath the clip is the rubber cup (small black or white dome) and below that, the keyboard membrane.
If the clip looks broken — a missing latch, a split frame, hooks bent up — that's why the key has been giving you trouble. See our common failures guide to confirm, and then search for your laptop model to grab a kit with a fresh clip.
Putting the key back
Reverse the removal: align the keycap over the clip, press down evenly until you hear two soft clicks (one for each side). Done. For tricky keys like the spacebar that have a metal stabilizer bar, see our spacebar install guide — those need a specific sequence.