Compressed-air blast tells you exactly how much you have been typing through. A 10-minute clean — lifting only two keys, no full disassembly — gets the crumbs, the cat hair, and the dust out properly. Here is the routine.
What you'll need
- A can of compressed air (the cheap kind from any office supply store).
- A soft brush — a clean unused paintbrush, a makeup brush, or even a clean toothbrush.
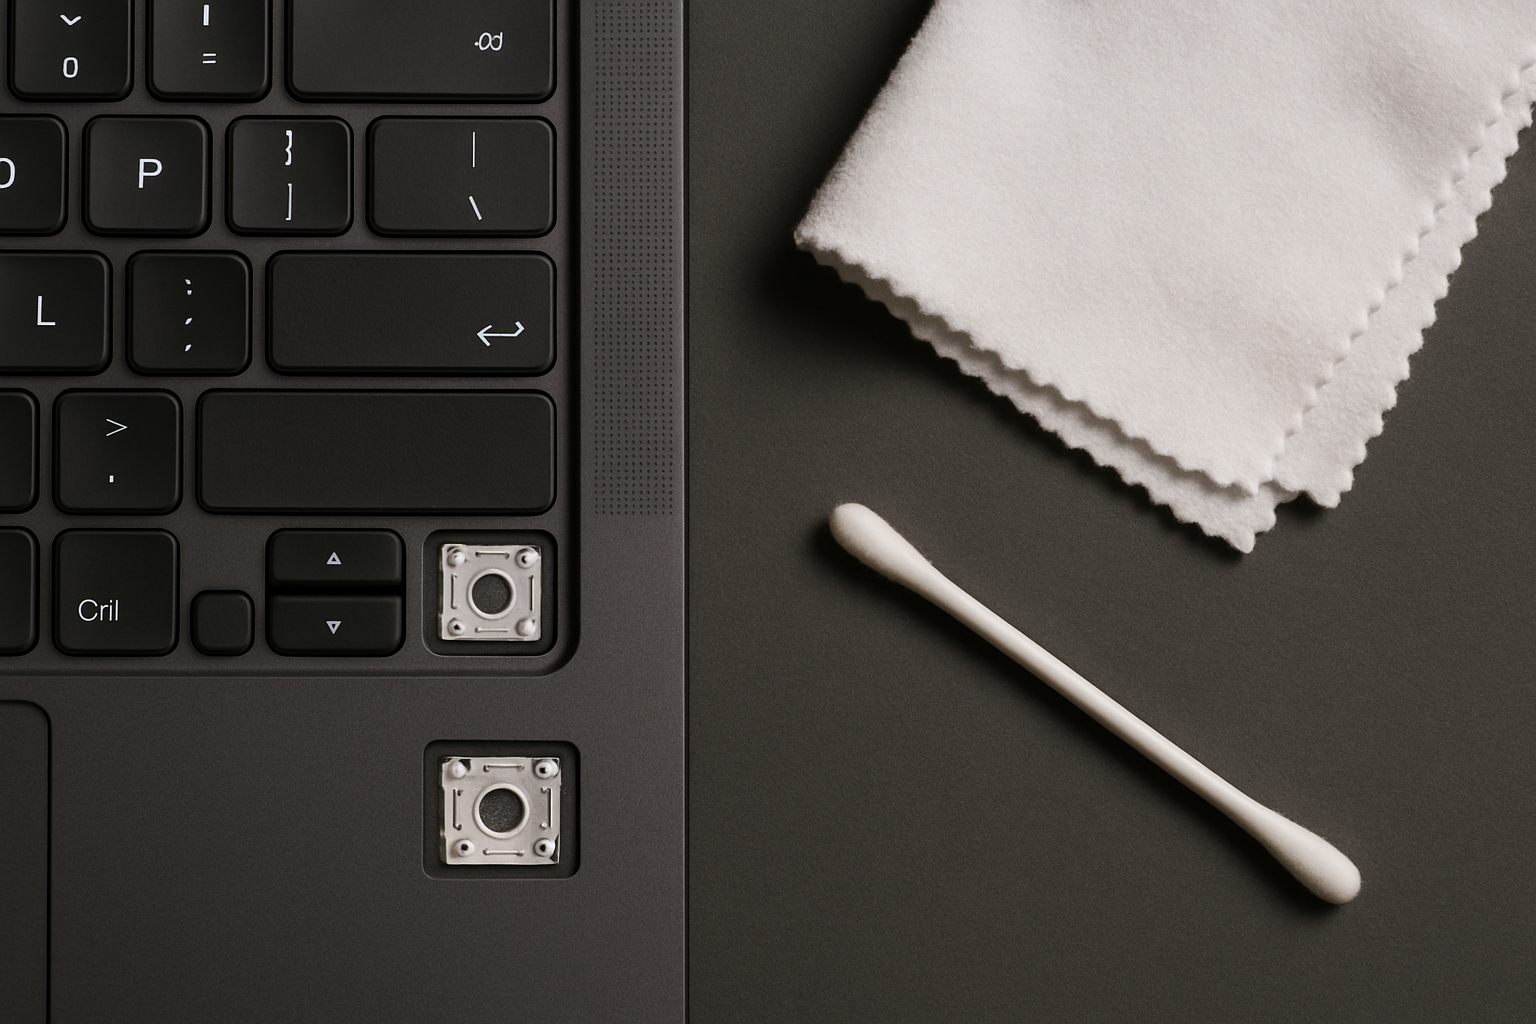
- A cotton swab and a small bottle of 91% or higher isopropyl alcohol.
- A clean microfiber cloth.
Skip the hairdryer and the vacuum. Hairdryers blow ambient air (including dust from across the room) into the keyboard at high velocity. Vacuums generate static electricity that can damage components — and on flexible laptop keys, they often pull caps off, sucking them into the bag where you'll never find them.
Step 1: Power off and tilt
Shut the laptop down properly. Unplug the charger. Stand the laptop on its side (left or right edge resting on a desk) with the keyboard facing you. Tilting helps debris fall out instead of further in during the next steps.
Step 2: First compressed-air pass
Hold the can about 4 inches from the keyboard and blast across each row of keys at a low angle — not straight down. The goal is to dislodge debris sideways out of the keys, not deeper into the membrane. Work top to bottom, then bottom to top.
Use short bursts (1–2 seconds) and keep the can upright. Tipping a compressed-air can sprays liquid propellant, which freezes plastic and can crack keycaps.
Step 3: Brush the surface
With the soft brush, sweep across the keys and into the gaps between them. The bristles will catch debris that air alone won't move — finger oil residue, pet dander, dried skin flakes. Brush in one direction (top to bottom) rather than scrubbing back and forth.
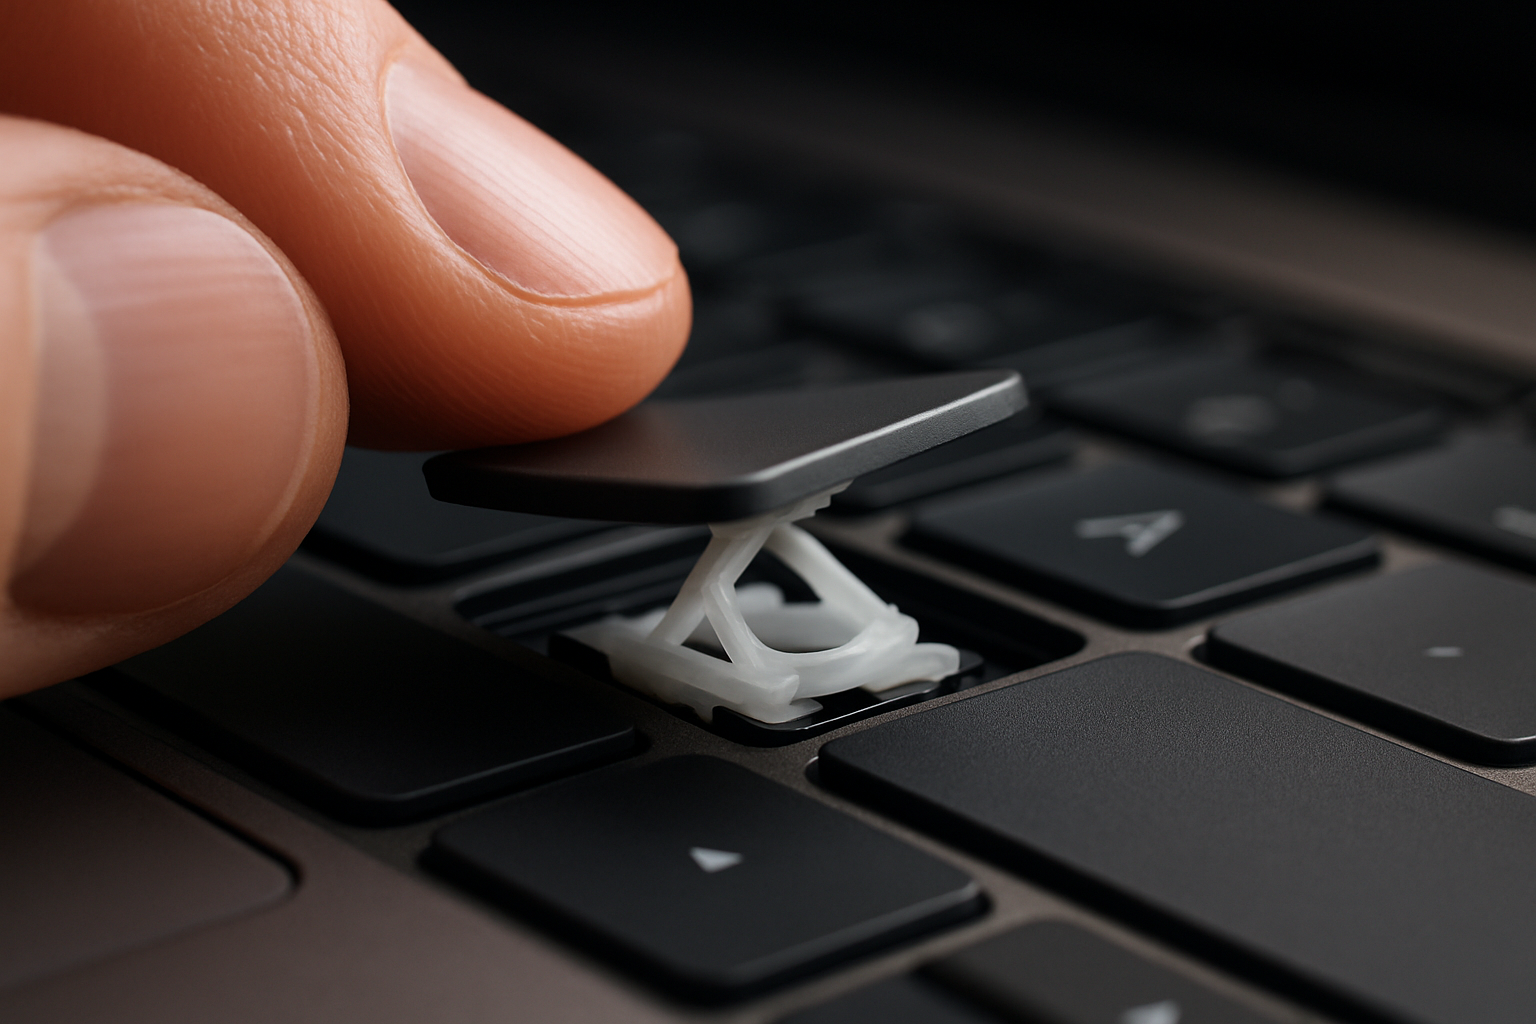
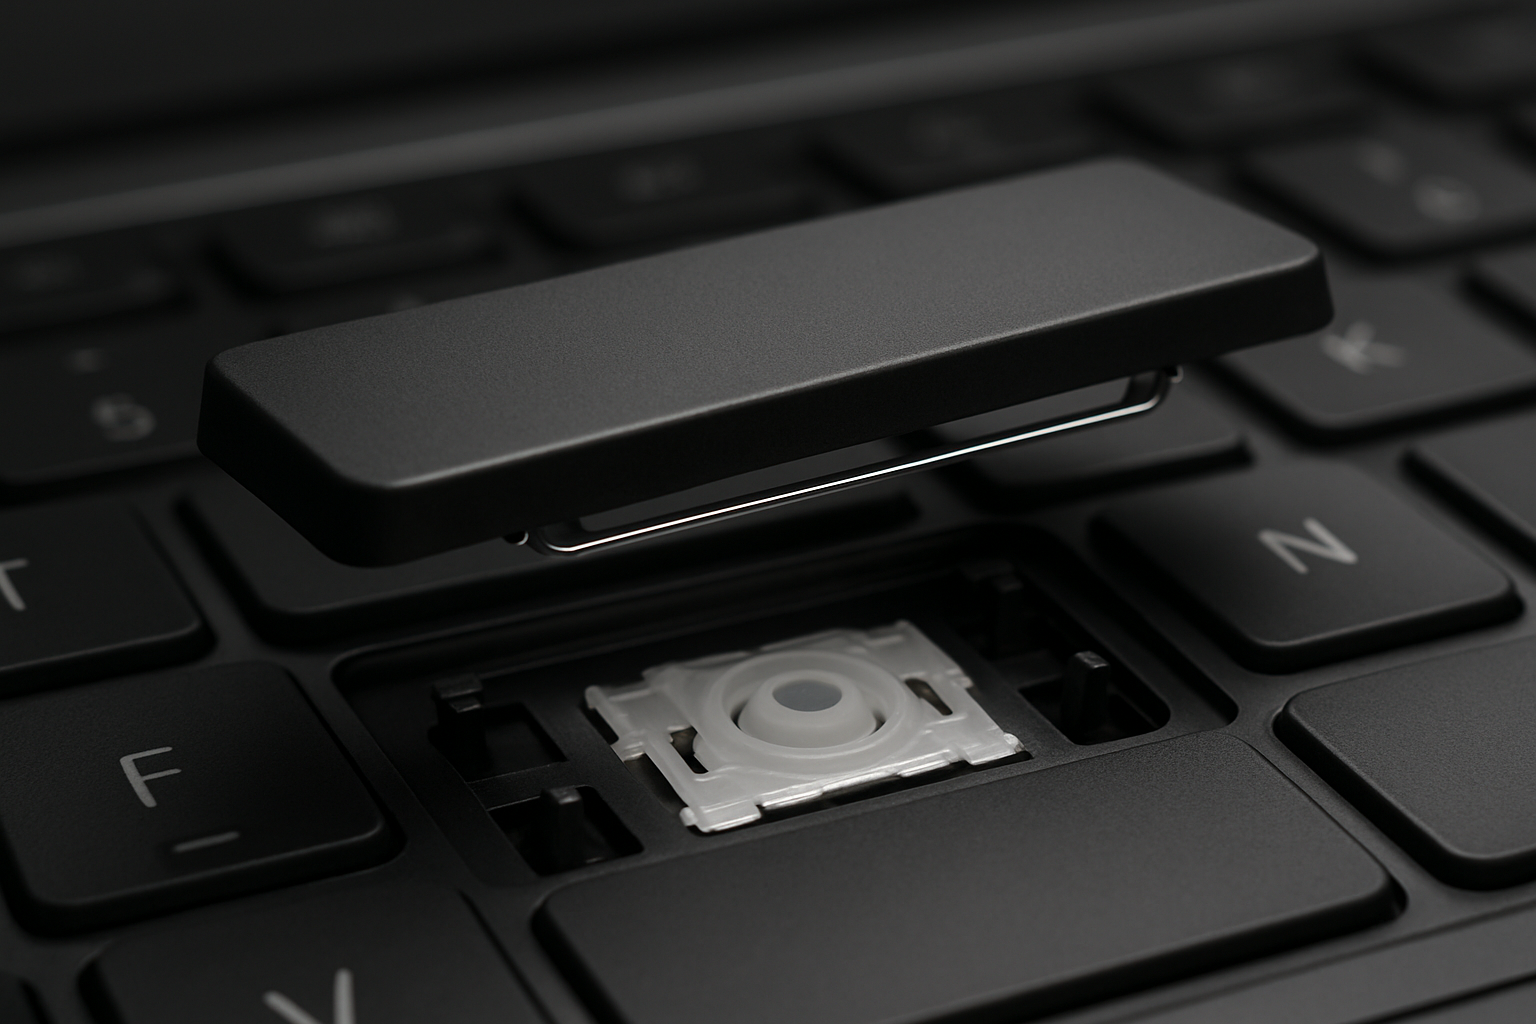
Step 4: Lift two keys, deep clean underneath
For the dirty grime that compressed air doesn't reach, you'll need to actually see under there. You don't have to lift them all — usually two strategically chosen keys give you enough access:
- The spacebar — covers the largest area of membrane, where the most crumbs accumulate.
- One letter key in the center (G or H usually) — gives you visibility into the middle of the keyboard.
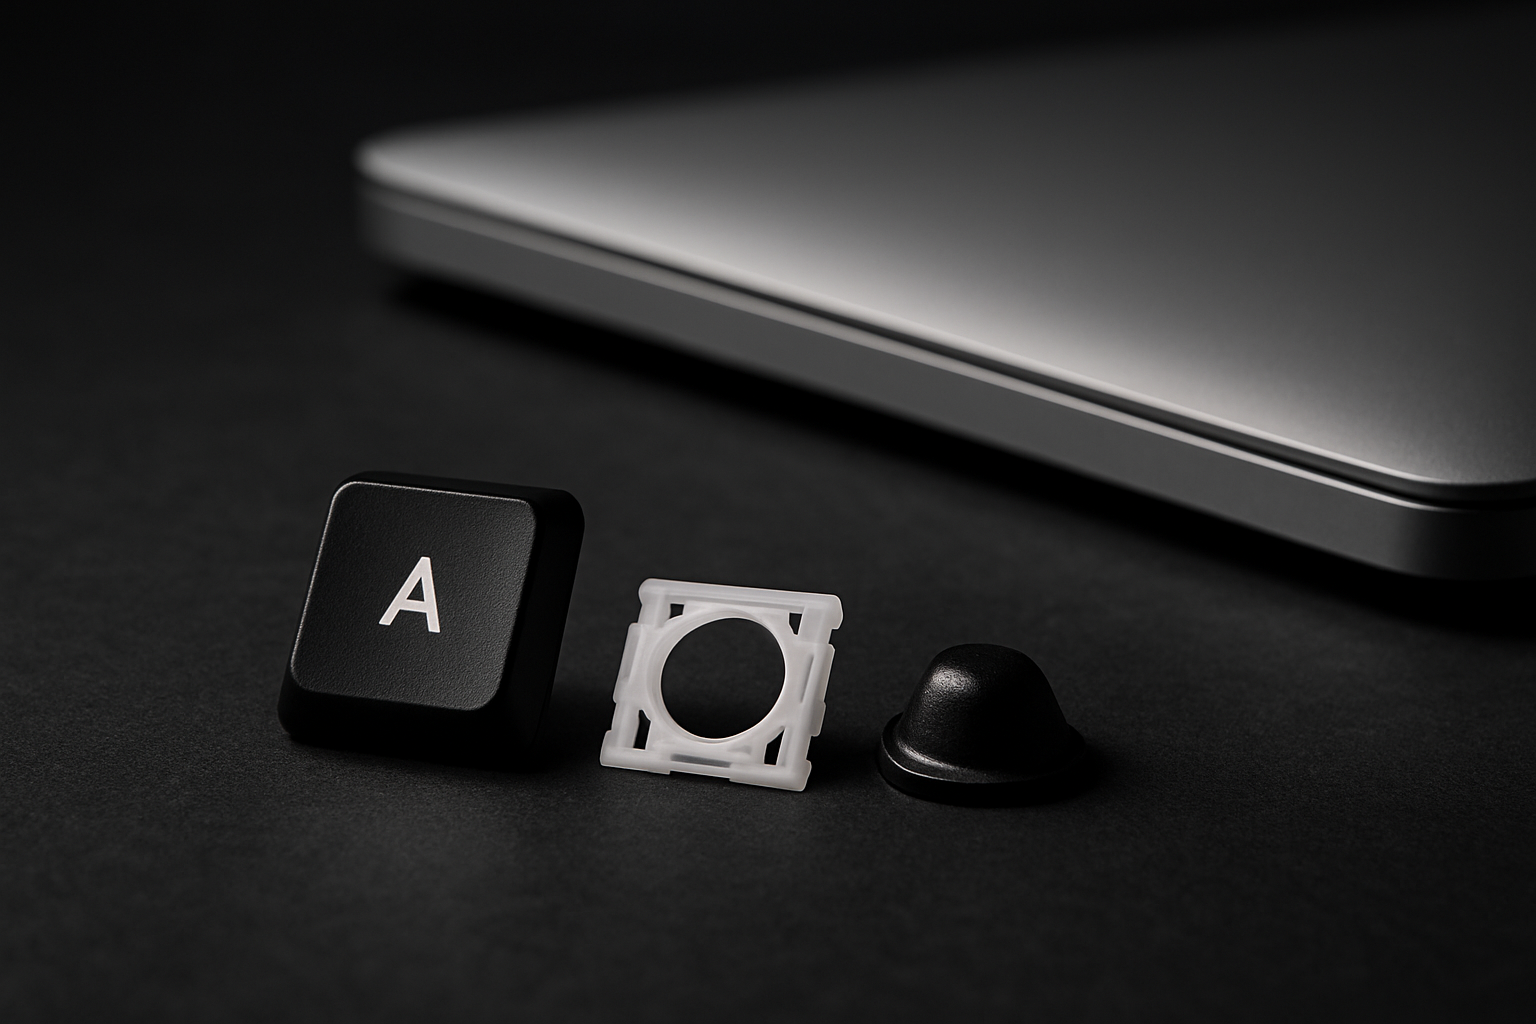
See our key removal guide for the lift technique. For the spacebar, see the spacebar guide — the metal bar means you need a specific reinstall sequence.
With the keys off, compressed air directly into the openings will blow out any compacted debris underneath. Follow with a cotton swab lightly dampened (not soaked) in isopropyl alcohol to lift any oily residue from the chassis and the cup.
Step 5: Wipe the caps and reinstall
While the keys are off, give the keycaps a wipe with the microfiber cloth. For really grimy caps (especially the most-used ones like E, A, S, spacebar), a damp microfiber with a few drops of isopropyl removes finger oil and restores the matte finish. Let the caps dry for two minutes before reinstalling.
Snap the keys back on, do a final compressed-air sweep across the whole keyboard, and you're done.
How often to do this
- Compressed-air-only pass: every 2–3 months.
- Full clean with key removal: once a year, or any time you notice a key feeling gritty or sticky.
- After eating at the desk: immediate compressed-air pass. Bread crumbs are the #1 cause of stuck keys we hear about.
If you find a damaged key while you're in there
Cleaning is the most common moment people notice their clip is cracked or their cup is torn. While you've already got the keys off, order the replacement kit and install it the day it arrives — the keys are already loose.